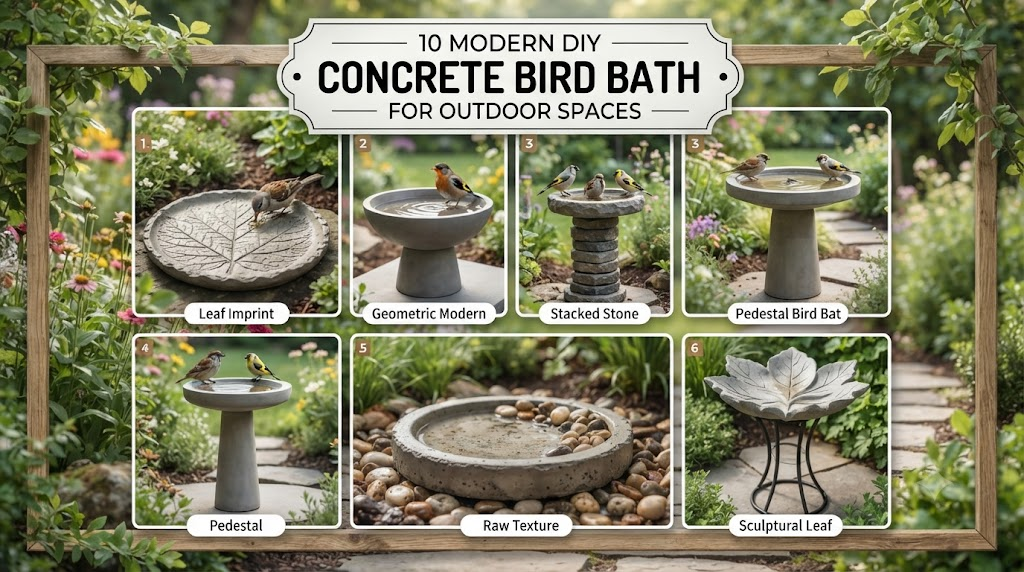
10 Modern DIY Concrete Bird Bath Ideas for Outdoor Spaces
A bird bath is one of the simplest ways to attract birds, butterflies, and other beneficial wildlife to your garden. While store-bought bird baths can be expensive and sometimes lack durability, a DIY concrete bird bath offers the perfect combination of strength, affordability, and creativity.
Concrete is one of the best materials for outdoor projects because it stands up to rain, sun, wind, and freezing temperatures far better than plastic or ceramic alternatives. Even better, you can customize the size, shape, texture, and finish to match your garden style.
Whether you love rustic landscapes, modern outdoor spaces, or classic English gardens, these DIY concrete bird bath ideas are practical, attractive, and built to last for years with minimal maintenance.
In this guide, you’ll discover eight durable DIY concrete bird bath ideas, plus expert building tips, recommended materials, and maintenance advice to help you create a beautiful backyard feature that birds will love.
Why Choose Concrete for a DIY Bird Bath?
Concrete has become one of the most popular materials for DIY bird baths because it combines durability, affordability, and design flexibility. Unlike lightweight plastic bowls that fade or crack over time, concrete provides a sturdy structure that remains stable even during strong winds.
Another advantage is customization. Concrete can be poured into almost any mold, allowing you to create everything from natural leaf shapes to elegant pedestal bird baths. Once cured properly, it requires very little maintenance besides occasional cleaning and sealing.
If you’re building a bird bath that you want to enjoy for many seasons, concrete is one of the smartest investments you can make.
Benefits of Concrete Bird Baths
| Feature | Benefit |
| Weather Resistant | Handles rain, heat, and frost |
| Heavy Weight | Won’t tip over easily |
| Affordable | Costs less than many store-bought models |
| Customizable | Endless shapes, textures, and finishes |
| Long Lifespan | Can last for decades with proper care |
| Eco-Friendly | Made from simple, natural materials |
Materials You’ll Need Before Starting
Before beginning your project, gather all the necessary materials. Having everything ready makes the building process smoother and helps ensure better results.
Basic Materials
| Material | Purpose |
| Quick-set concrete mix | Main construction material |
| Mixing bucket | Mixing concrete |
| Water | Concrete preparation |
| Rubber gloves | Hand protection |
| Trowel | Smoothing concrete |
| Mold or plastic bowl | Creating the birdbath shape |
| Cooking spray or mold release | Easy mold removal |
| Concrete sealer | Weather protection |
| Sandpaper or sanding stone | Smooth edges |
Optional Decorative Materials
- Mosaic tiles
- Decorative pebbles
- River rocks
- Glass gems
- Outdoor paint
- Natural leaves
- Metal reinforcement mesh
- Driftwood accents
1. Leaf-Stamped Concrete Bird Bath
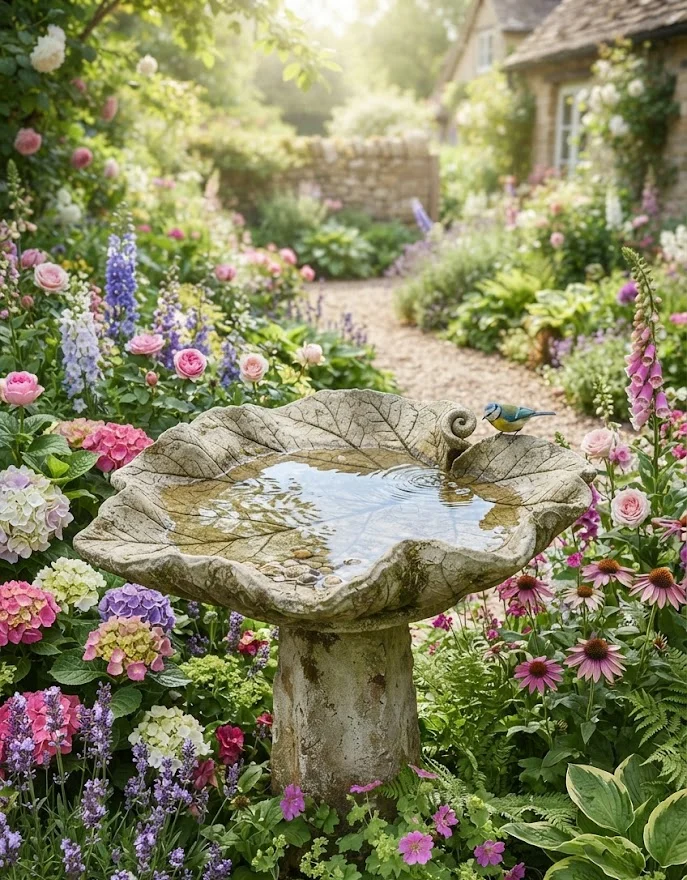
A leaf-stamped bird bath is one of the easiest and most beautiful DIY concrete projects. Large leaves naturally create shallow bowls that birds find comfortable while adding an organic appearance to your garden.
To make one, place a large leaf—such as hosta, rhubarb, elephant ear, or gunnera—face down on a mound of damp sand. Cover the back of the leaf with a thick layer of concrete and smooth the surface using a trowel.
Allow the concrete to cure for at least 24 to 48 hours before gently removing the leaf. The finished bowl will display detailed veins and textures that look almost identical to real foliage.
For additional safety, place a few smooth stones inside the finished bath to provide secure footing for smaller birds and butterflies.
Materials Needed
| Item | Quantity |
| Large leaf | 1 |
| Concrete mix | As needed |
| Damp sand | 1 pile |
| Cooking spray | Small amount |
| Gloves | 1 pair |
| Trowel | 1 |
Expert Tips
- Use thick, healthy leaves for better impressions.
- Spray the leaf lightly with cooking oil before pouring concrete.
- Keep the bowl no deeper than 2 inches.
- Seal after curing for maximum durability.
2. Mosaic Concrete Bird Bath
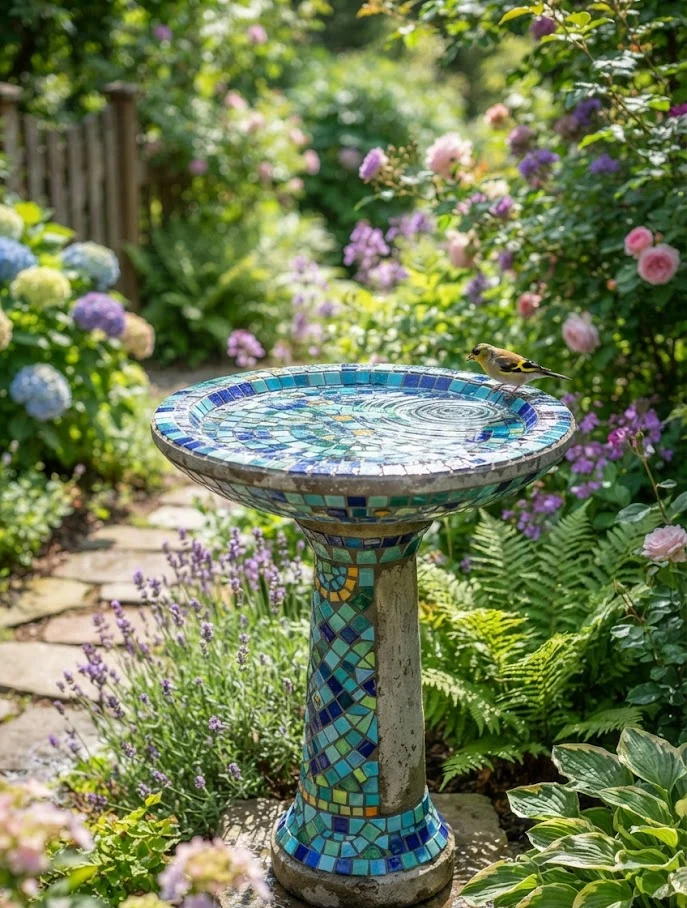
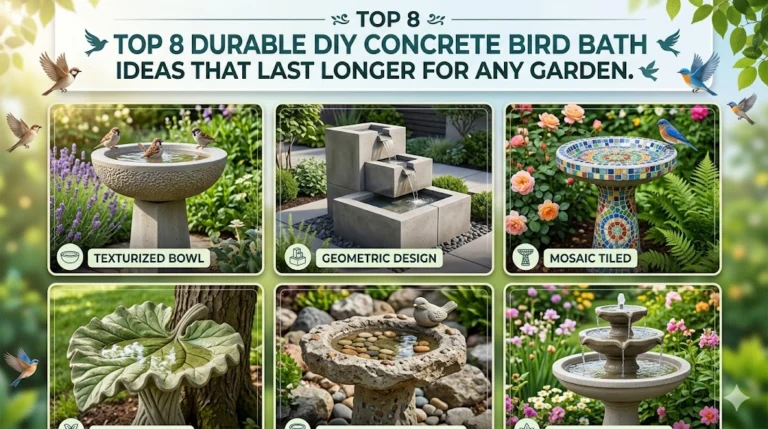
If you enjoy colorful garden art, a mosaic concrete bird bath combines durability with artistic creativity. Broken ceramic dishes, leftover tiles, sea glass, or stained glass pieces can all be transformed into a unique decorative centerpiece.
Begin by casting a simple concrete bowl using a plastic container as the mold. Once fully cured, attach mosaic pieces around the exterior using waterproof adhesive.
After the adhesive dries, fill the joints with weather-resistant grout and finish with a quality grout sealer to protect against moisture and frost damage.
The result is a durable bird bath that doubles as an eye-catching piece of garden art.
Decorative Materials
- Ceramic tile pieces
- Broken pottery
- Sea glass
- Waterproof tile adhesive
- Grout
- Outdoor grout sealer
Benefits
- Highly customizable
- Excellent weather resistance
- Beautiful decorative finish
- Great way to recycle old materials
3. Classic Pedestal Concrete Bird Bath
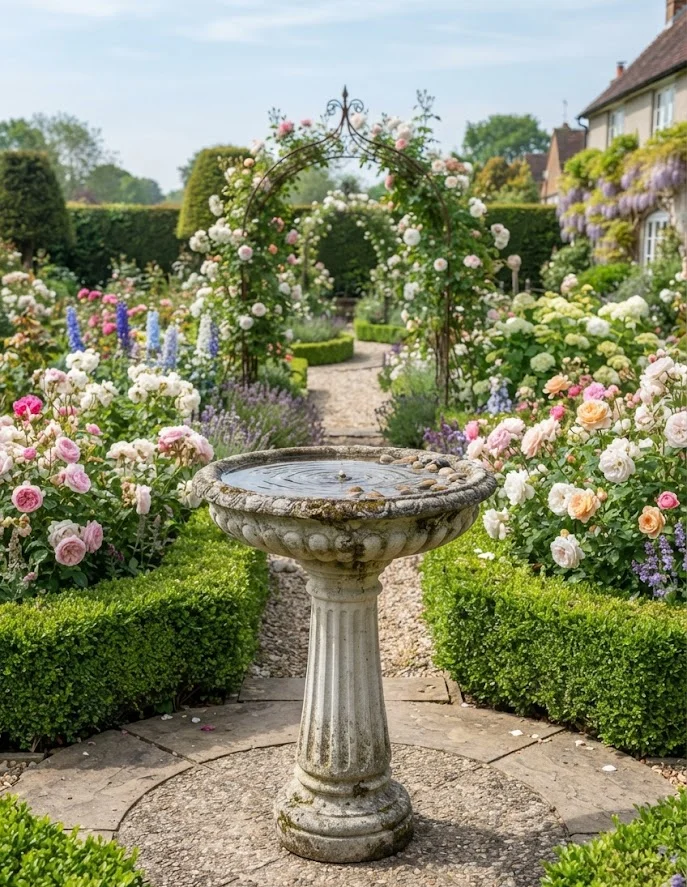
A pedestal-style bird bath offers a timeless appearance that complements almost every garden style. Raising the bowl above ground also makes birds feel safer because they have a clear view of approaching predators.
You can create the pedestal using PVC pipe molds, large plastic containers, or commercial concrete molds. Reinforcing the column with metal rods or wire mesh greatly improves long-term durability.
Once the pedestal cures, attach the bowl using landscape adhesive or additional concrete mortar.
This classic design works beautifully in formal gardens, cottage landscapes, and front-yard flower beds.
Advantages
| Feature | Benefit |
| Elevated bowl | Better bird visibility |
| Stable design | Hard to tip over |
| Elegant appearance | Fits most gardens |
| Long lifespan | Extremely durable |
4. Rustic Log Base Concrete Bird Bath
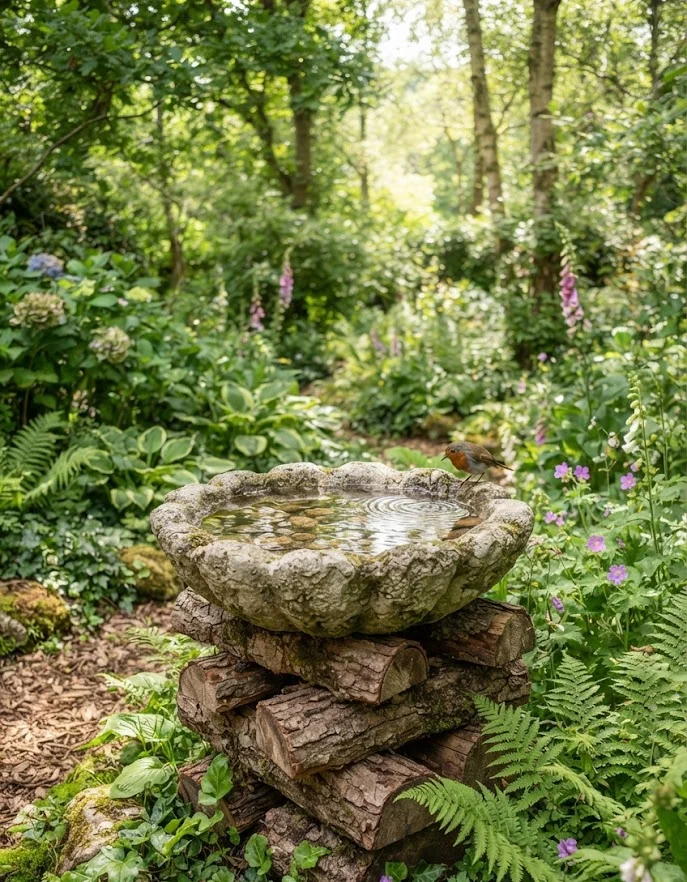
If you love woodland or farmhouse gardens, a rustic log base birdbath is an excellent project. Instead of casting a full concrete pedestal, you simply create a durable concrete bowl and mount it on a sturdy log base.
Choose rot-resistant logs such as cedar, oak, or treated hardwood. Stack or secure them into a stable base, then place the cured concrete bowl on top. The natural wood softens the look of the concrete and blends beautifully with flowers, shrubs, and trees.
Although the wooden base will eventually weather, it can easily be replaced without rebuilding the concrete bowl.
Materials
| Material | Purpose |
| Concrete bowl | Water basin |
| Hardwood logs | Base |
| Exterior screws | Secure logs |
| Landscape adhesive | Bowl attachment |
| Decorative pebbles | Stabilization |
Why You’ll Love It
- Rustic appearance
- Budget-friendly
- Easy weekend project
- Blends naturally into woodland gardens
- Simple to repair
5. Upcycled Lamp Post Concrete Birdbath
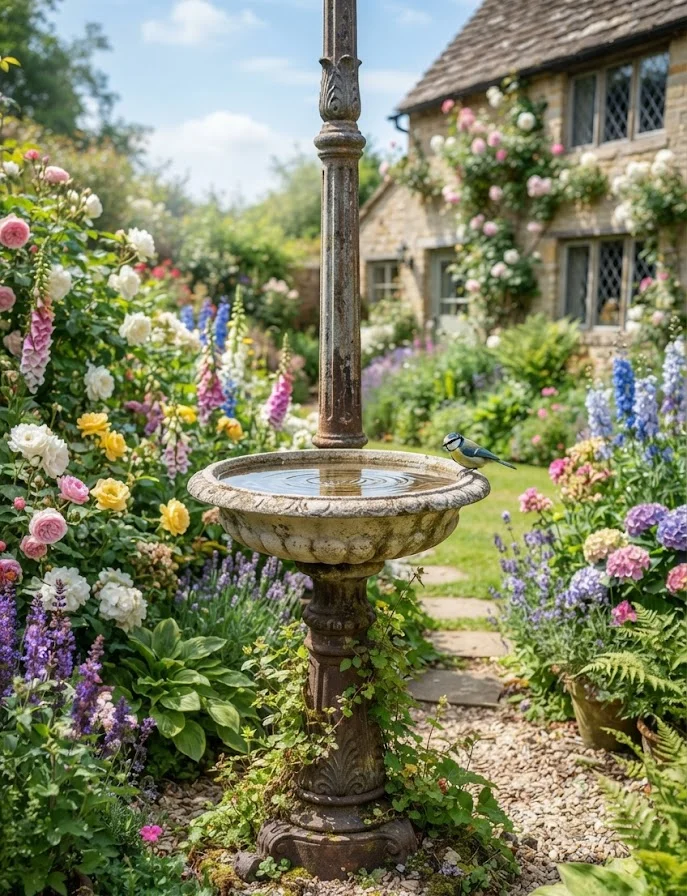
An old lamp post can become the perfect pedestal for a DIY concrete bird bath. This upcycling project saves money while giving discarded materials a beautiful new purpose.
After cleaning and painting the lamp post, attach a handmade concrete bowl using heavy-duty landscape adhesive and hidden brackets for extra support. Filling hollow metal posts with gravel or sand increases stability and prevents tipping.
This design works especially well in cottage gardens, vintage landscapes, and traditional outdoor spaces.
Benefits
- Recycles old materials
- Strong, stable support
- Elegant appearance
- Affordable to build
- Environmentally friendly
Expert Tip
Use outdoor metal paint to protect older lamp posts from rust and extend their lifespan.
6. Natural Rock Concrete Bird Bath
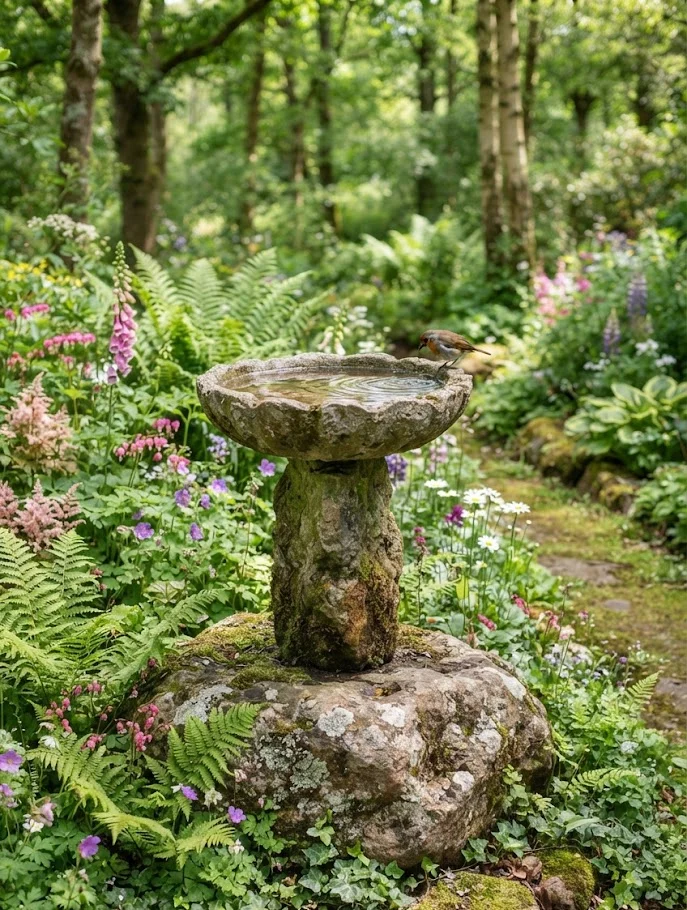
For gardeners who prefer a completely natural look, combining concrete with large landscape stones creates a bird bath that appears as though it has always belonged in the garden.
Build a simple shallow concrete bowl, then mount it on a flat boulder or stacked natural rocks. The irregular stone texture contrasts beautifully with the smooth concrete basin.
Because rocks are extremely stable, this design requires very little maintenance and performs well in all weather conditions.
Best Locations
- Woodland gardens
- Rock gardens
- Cottage landscapes
- Wildlife gardens
- Native plant borders
Advantages
- Extremely durable
- Natural appearance
- Excellent stability
- Minimal maintenance
7. Modern Square Concrete Bird Bath
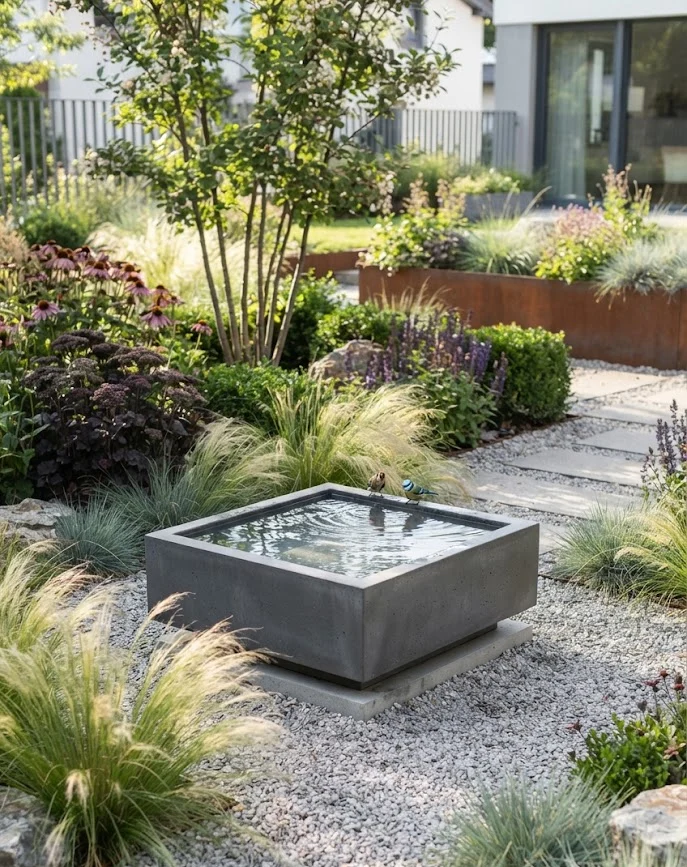
Modern gardens often feature clean lines and geometric shapes. A square concrete bird bath complements these contemporary spaces perfectly.
Instead of using round molds, build a simple square mold from melamine boards or plastic forms. Reinforce larger designs with wire mesh before pouring concrete.
After curing, lightly polish the surface or leave it with a raw industrial finish depending on your preferred style.
Pair this bird bath with ornamental grasses, black planters, and gravel pathways for a sophisticated landscape design.
Modern Design Features
- Clean geometric shape
- Minimalist appearance
- Easy to customize
- Durable construction
- Perfect for contemporary homes
8. Concrete Bird Bath with Pebble Rim
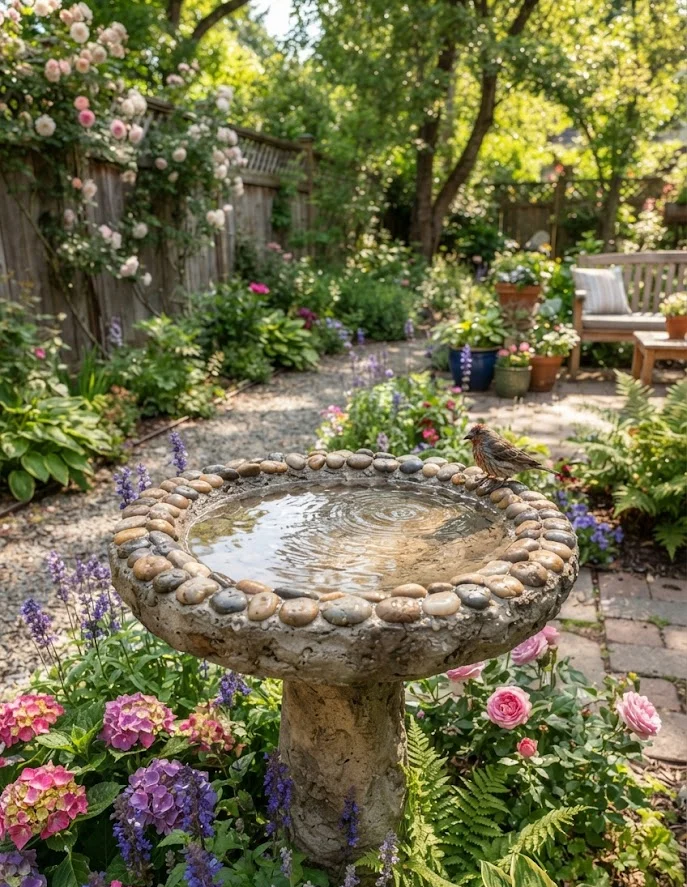
A pebble-rim bird bath combines the durability of concrete with the natural beauty of river stones. Before the concrete fully cures, gently press smooth pebbles around the outer rim or base to create texture and visual interest.
The stones also provide extra grip for birds when landing on the edge of the bath.
Choose rounded river rocks rather than sharp gravel to ensure birds can perch comfortably.
Decorative Options
- River pebbles
- Beach stones
- Polished gravel
- Slate chips
- Decorative glass pebbles
9. Hanging Concrete Leaf Bird Bath
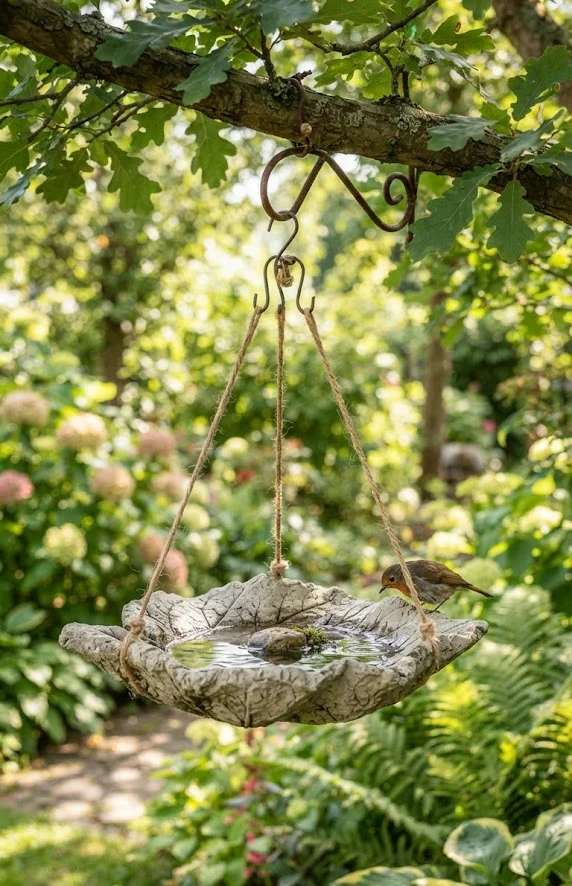
A hanging leaf-stamped bird bath is a lightweight variation that adds charm to small gardens, balconies, or patios. Instead of placing the mold on the ground, the concrete leaf is shaped with a reinforced rim so it can be suspended from chains or strong rope.
To make it, follow the same leaf-stamping method but embed small metal hooks or wire loops into the edges while the concrete is still wet. Once cured, hang it from a sturdy tree branch or garden stand. The gentle swing in the air can also help keep water cleaner for longer.
Key Benefits
- Perfect for small outdoor spaces
- Decorative and space-saving
- Naturally keeps water cooler in shade
- Attractive hanging garden feature
10. Tiered Garden Stone Concrete Bird Bath
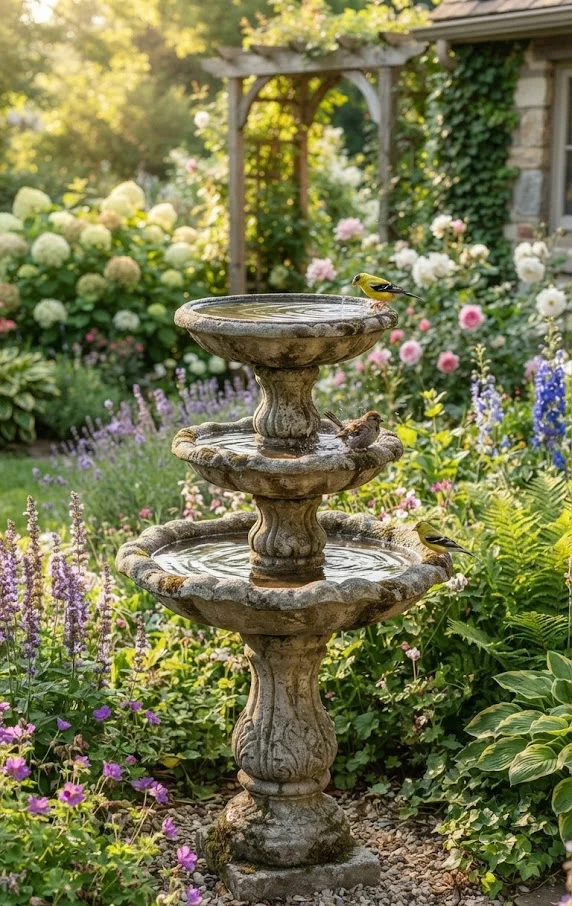
A tiered stone-style bird bath creates a dramatic focal point in larger gardens. It uses stacked concrete bowls or stone-like forms at different heights, allowing multiple birds to use it at once.
Start by casting two or three concrete bowls in different sizes. Stack them using a strong central rod or hidden concrete adhesive. You can also surround the structure with natural stones for a more organic waterfall-like appearance.
This design not only attracts birds but also adds movement and visual depth to your garden.
Key Benefits
- Multi-level drinking and bathing space
- Eye-catching garden centerpiece
- Very stable and long-lasting
- Works well in large landscapes
Best Concrete Mix for DIY Bird Baths
Not every concrete mix is ideal for outdoor bird baths. Choosing the right product greatly improves durability.
| Concrete Type | Best For | Recommendation |
| Quick-Set Mix | Small projects | ⭐⭐⭐⭐⭐ |
| All-Purpose Mix | Most bird baths | ⭐⭐⭐⭐⭐ |
| Fiber-Reinforced Mix | Large designs | ⭐⭐⭐⭐⭐ |
| Lightweight Concrete | Decorative only | ⭐⭐⭐ |
| Decorative Concrete | Indoor décor | ⭐⭐ |
For most homeowners, an all-purpose or fiber-reinforced concrete mix offers the best balance of strength, affordability, and ease of use.
Latest Bird Bath Trends for 2026
Garden design continues to focus on sustainability and wildlife-friendly landscaping. Concrete bird baths remain popular because they are long-lasting and environmentally friendly.
Popular Trends
- Organic leaf-inspired bowls
- Natural stone pedestals
- Minimalist concrete designs
- Recycled material projects
- Wildlife-friendly native gardens
- Solar-powered bird bath fountains
- Moss and weathered finishes
- Pollinator-friendly landscaping
Adding a small solar fountain to your concrete bird bath can also help attract more birds by keeping the water fresh and moving.
Concrete Bird Bath Cost Comparison
| Style | Estimated DIY Cost | Build Time |
| Leaf Birdbath | $15–30 | 2–3 hours |
| Mosaic Bird Bath | $35–70 | 1 day |
| Pedestal Bird Bath | $40–80 | 1–2 days |
| Log Base Bird Bath | $25–50 | 2 hours |
| Lamp Post Bird Bath | $30–60 | Half day |
| Rock Base Bird Bath | $20–45 | 2–3 hours |
| Modern Square Design | $35–75 | 1 day |
| Pebble Rim Design | $25–55 | Half day |
Professional Tips for Long-Lasting Results
- Allow concrete to cure for at least 48 hours before moving it.
- Wait 7 days before filling it with water for maximum strength.
- Seal the surface every 1–2 years.
- Keep water depth between 1 and 2 inches.
- Place the bird bath in partial shade to reduce algae growth and water evaporation.
- Add several flat stones so butterflies and small birds can perch safely.
Concrete Bird Bath Maintenance Guide
Even though concrete bird baths are extremely durable, regular maintenance helps them stay attractive and safe for wildlife. A few minutes of care each week prevents algae buildup, keeps the water fresh, and extends the life of your DIY project.
Replace the water every two to three days during warm weather. Fresh, clean water attracts more birds and discourages mosquitoes from breeding. Scrub the basin weekly using a stiff brush and plain water. If algae develops, clean the bath with a solution of one part white vinegar to nine parts water, then rinse thoroughly before refilling.
Avoid using household soaps or harsh detergents, as residue can be harmful to birds. A concrete sealer applied every one to two years also helps reduce staining and moisture absorption.
Weekly Maintenance Checklist
- Empty old water.
- Remove leaves and debris.
- Scrub the basin with a stiff brush.
- Rinse thoroughly with clean water.
- Refill with fresh water.
- Check for small cracks or chips.
Seasonal Care Tips
Different seasons require slightly different care to keep your concrete bird bath in excellent condition.
Spring
Spring is the perfect time to deep clean your birdbath after winter. Remove dirt, moss, and debris before birds begin nesting.
Summer
Hot weather causes water to evaporate quickly. Refill the bath frequently and place it where it receives morning sun but afternoon shade.
Autumn
Falling leaves can quickly clog bird baths. Remove leaves daily and keep the basin clean to prevent staining.
Winter
If temperatures regularly fall below freezing, empty the bird bath before water freezes. Freezing water expands and may eventually damage untreated concrete. In colder regions, cover the bath or store removable bowls indoors until spring.
Where Should You Place a Bird Bath?
Location is just as important as the design itself. Birds naturally prefer areas where they feel safe while still having easy access to food and shelter.
Place your bird bath near shrubs or small trees so birds have nearby cover if predators appear. However, avoid placing it directly beneath trees, where falling leaves and droppings can quickly dirty the water.
For the best results, position the bird bath on level ground where it receives partial shade during the hottest part of the day. This keeps the water cooler and slows evaporation.
Ideal Placement Checklist
| Location | Recommendation |
| Partial shade | ⭐⭐⭐⭐⭐ |
| Near shrubs | ⭐⭐⭐⭐⭐ |
| Close to bird feeders | ⭐⭐⭐⭐ |
| Under large trees | ⭐⭐ |
| Full afternoon sun | ⭐⭐ |
| Open lawn | ⭐⭐⭐ |
Pros and Cons of DIY Concrete Bird Baths
| Pros | Cons |
| Extremely durable | Heavy to move |
| Weather-resistant | Requires curing time |
| Budget-friendly | Can crack if improperly cured |
| Fully customizable | Needs occasional sealing |
| Stable in windy conditions | Heavier than plastic models |
| Attractive garden feature | Takes time to build |
DIY Concrete Bird Bath Planning Checklist
Before starting your project, make sure you’ve covered all the basics.
Materials
- ✔ Concrete mix
- ✔ Mixing bucket
- ✔ Water
- ✔ Mold or form
- ✔ Gloves
- ✔ Trowel
- ✔ Concrete sealer
Building
- ✔ Choose a shallow bowl design.
- ✔ Reinforce larger bird baths if needed.
- ✔ Smooth rough edges.
- ✔ Allow proper curing time.
- ✔ Seal before outdoor use.
Placement
- ✔ Level surface
- ✔ Partial shade
- ✔ Near natural cover
- ✔ Easy access for cleaning
Frequently Asked Questions
1. How deep should a concrete bird bath be?
Most garden birds prefer shallow water between 1 and 2 inches deep. If your bowl is deeper, add smooth stones to create safe standing areas.
2. How long does a DIY concrete bird bath last?
When properly cured, sealed, and maintained, a concrete bird bath can last 10 to 20 years or even longer.
3. Should I seal my concrete bird bath?
Yes. A bird-safe concrete sealer helps reduce water absorption, prevents staining, and increases durability. Reapply every one to two years.
4. Can I paint my concrete bird bath?
Yes. Use non-toxic outdoor masonry or concrete paint. After painting, protect the finish with a clear, wildlife-safe exterior sealer.
5. What’s the best concrete mix for bird baths?
An all-purpose or fiber-reinforced concrete mix provides the best combination of strength, durability, and ease of use for most DIY projects.
6. Why aren’t birds using my bird bath?
Birds may need time to discover a new bird bath. Keep the water fresh, place it near shrubs for safety, add a few flat stones for perching, and avoid placing it in busy or noisy areas.
Final Thoughts
A DIY concrete bird bath is more than just a garden project—it’s a lasting investment in both your outdoor space and local wildlife. With the right materials, proper curing, and regular maintenance, you can create a bird bath that remains beautiful and functional for many years.
Whether you prefer a natural leaf-stamped design, a colorful mosaic centerpiece, a rustic log base, or a sleek modern concrete bowl, each project offers its own unique style while providing birds with a safe place to drink and bathe.
Start with the design that best matches your garden, follow the construction tips outlined in this guide, and don’t forget that even simple details like proper placement and routine cleaning can make a big difference. Your garden will become more inviting, more beautiful, and full of the cheerful activity of visiting birds throughout the seasons.